GreenBox

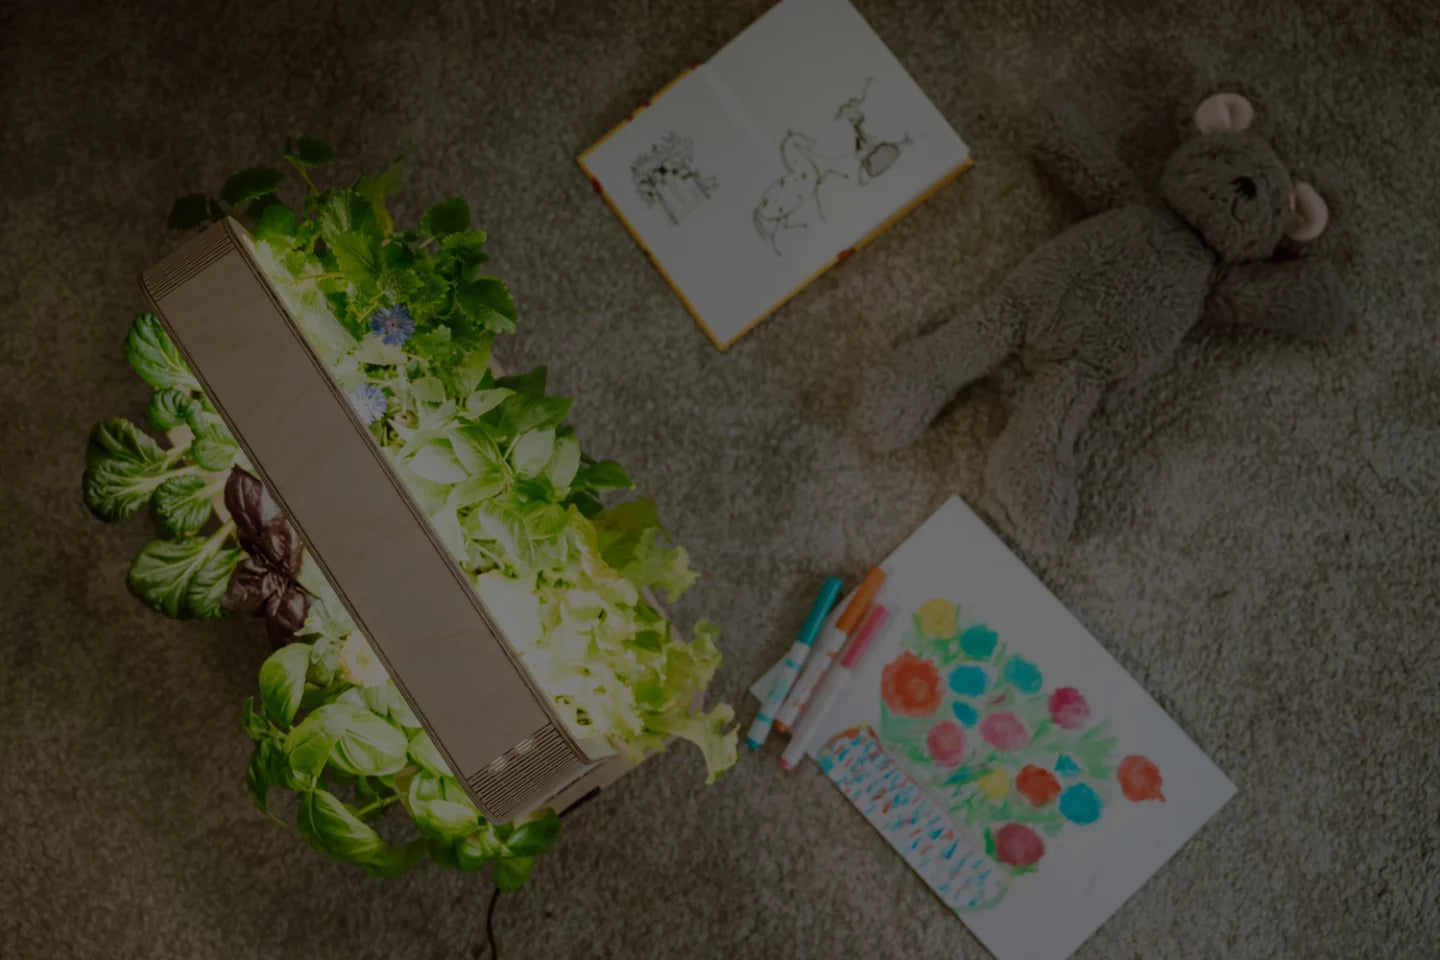
The housing of the GreenBox is made of birch wood from European timber forests. It is cut by a laser and then finished by hand. Each GreenBox is manually assembled, and quality checked in our Berlin workshop. Parts of the fabrication are done by Berlin's sheltered workshops, which is not only local and sustainable, but also gives us more control over the production process.

With its 40.5 x 21 x 34 cm (W/D/H) the GreenBox fits into every home and catches everyone's attention!

The GreenBox can be placed in almost any interior: e.g. on the kitchen counter to always have your herbs at hand. In the office, its greenery improves the indoor climate - thus helping to increase productivity. In the bathroom, it nourishes the floral decoration and provides soothing greenery in the bedroom. As an eye-catcher in the living room, it will not go unnoticed by any guest. We recommend that you do not place the GreenBox near radiators or air conditioners, as the plants do not like draughts or dry air. The GreenBox is not suitable for outdoor use.

The U-Plugs are designed to prevent the growth of algae or mould on the moist substrate surface that is exposed to light. (The PlantPlugs do not contain herbicides, fungicides or other harmful substances). Place the U-plates over the PlantPlugs after sowing. Seeds and seedlings still get enough light. The U-plates should be left in place until the plant can overshadow the surface of the PlantPlugs with its own leaves. Then the U-Plugs can be removed.
The germination bonnets act like a small greenhouse: they create the perfect climate for the sensitive germination phase of your plants by concentrating the direct heat above the PlantPlug and protecting the tender germ from draughts. Put the germination bonnets over the U-plates after sowing and remove them as soon as the plants start to touch them from the inside.

Yes, an 8-pack of U-discs and an 8-pack of germination domes are part of the basic equipment of the GreenBox. You will receive them with every order of a GreenBox, a GreenBox Bundle and all product variants of special GreenBox Editions.

Plants and PlantPlugs

Herbs, salads, but also small chillies, cherry tomatoes and many types of flowers can grow in the GreenBox. You can also grow exotic herbs that you would normally not find in the supermarket. The GreenBox is also a very good growing station for larger plants (such as zucchini or cucumbers) that can later be transferred to your garden when the weather warms up.

You can grow different types of plants at the same time! Some plants grow slower, others faster. We have already put together plants with similar growth rhythms in our PlantPlug sets.

Our PlantPlugs consist mainly of coconut fibre, a by-product of the coconut industry. A mineral fertiliser that provides the plants with good nutrients is also included. Of course, they are 100% biodegradable and free of pesticides, fungicides, insecticides, genetically modified organisms or otherwise hazardous substances.

The optimal storage for the PlantPlugs: dry, dark and at room temperature. Stored this way, they will last for at least 2 years.

The starter set comes with 2 basil varieties (Basil Genovese and Lemon Basil) and 2 lettuce varieties (Looseleaf Lettuce and Red Romaine Lettuce) - perfect for getting started!

Of course! We also offer PlantPlugs without seeds. With the 24 PlantPlugs of the Experimental Set, you can experiment with the seeds of your choice. You may also plant individually selected seeds in your GreenBox. These are available in our seed selection in both single and 4-packs.

As the plant grows, its roots penetrate the PlantPlug more and more, so that in the end they can no longer be separated from it. To provide space and nutrients for the roots of a new plant, you should use a new PlantPlug for a new sowing.

In many cases you can harvest several times: If you only cut off the outer leaves of lettuce and leave the inside, it will continue to grow. With herbs, it is best to cut off the upper shoots, which are located above the leaf branches. This way, new shoots can grow.

You can also try out your own substrates. However, we cannot guarantee successful growth with other substrates. In addition, you cannot rely on the functionality of the water level sensor, because it will be less clean if sand, soil, or humus particles dissolve in the tank’s water. The PlantPlugs, on the other hand, maintain their shape in contact with water. By virtually not shedding any particles, they are very clean to handle.

Definitely! You can also offer larger plants optimal starting conditions in the GreenBox. As soon as the "nursery" becomes too small for them, you can repot them in normal soil (indoors or outdoors). Spring is a particularly popular time to grow seedlings and then repot them. You can also use the GreenBox as the perfect growing station for your (vegetable) garden. With the PlantPlugs as a growing base, the whole process is clean and uncomplicated.

To prevent algae or mould from forming on the moist and light shining surface of the PlantPlugs, we have developed the U-plates. These are placed on the substrate surface after sowing. Seeds and seedlings still get enough light.

The U-plates should be left in place until the plant has formed enough leaves to overshadow the surface on its own. Then the U-plates can be removed.

Pre-germination is well suited for large seeds such as sugar snap peas.

You will need sturdy, absorbent paper towels, for example kitchen paper, and a plastic bag.

Moisten the paper so that it is soaked but not dripping wet. Spread the seeds out flat, preferably without them touching each other. Cover everything with another damp cloth and press down lightly. Place the paper in the plastic bag and seal it lightly. Everything can then be left in a warm place.

After 2 days, you should take a look inside and leave the bag open for a while to allow air to circulate. You may need to moisten a little more afterwards. From then on, you should repeat this process daily until the seeds have germinated. Finally, you can transplant the sweet pea into the PlantPlug to a depth of approx. 1-2 cm.


Mushroom Packs

It's as simple as it can be. To get started, place the mushroom package in the empty water tank of the GreenBox, cut an X in the foil from above and spray it vigorously with water. It is not a problem if you also cut into the substrate when making the incision. This will have no effect on your harvest.

Follow the instructions in the app for the optimal setting of the grow light (use the cold mushroom light for 12 hours).

Continue to spray the incision two to three times a day (about 6 - 8 sprays per watering are sufficient). Young mushrooms will appear in about 4 - 10 days.

Ideally, do not spray the water directly onto the mushrooms, but spray the area around the outside of the fruiting bodies.

We strongly recommend starting your mushroom adventure with the Pink Oyster Mushroom , as it is the only substrate that cannot be stored in the fridge. Incidentally, it also grows the fastest of all and is ready to harvest after 10 days at the latest.

For best results, we generally recommend using the substrates shortly after receipt.

Otherwise, the substrates can be stored unopened at room temperature for up to 7 days after arrival.

All packs except the Pink Oyster Mushroom can be stored unopened in the refrigerator for up to 4 weeks after arrival.

While the first harvest will probably be the largest, you can do more than one growing cycle with a single mushroom pack. In most cases, you can look forward to 2 - 3 harvests if stored correctly.

Please note: We guarantee at least one harvest. The later harvest depends more on the growing environment and the care of the kit!

Leave the substrates to rest for 5 - 8 days:

- Make sure to remove all remnants of the previous harvest and small pieces of mushrooms left on the substrate.

- Fold the plastic flaps back down so that the substrate is covered by the foil again.

- Both the substrate of the lemon and the spoon-shaped side shoot can be stored in the refrigerator (at a temperature of around 3 degrees Celsius).

- It is best to store the rose side shoot substrate in a dark place at a temperature of 9 - 11 degrees Celsius or room temperature if you cannot provide this temperature range.

- For clean storage and to prevent the substrate from drying out, we recommend storing the substrate with the X-cut facing downwards in the empty water tank. The white filter on the foil of the substrate should always have at least a slight air supply.

After 5 - 8 days, take the water tank of the GreenBox and fill it one third full with cold water. Place the substrate in the water with the X-cut facing downwards and leave it to soak for 12 hours. Please make sure that the substrate is about halfway in the water, as the mushrooms need a constant supply of oxygen.

Remove the substrate from the water tank and leave it face down (i.e. X-cut downwards) for 30 minutes to allow excess water to drain away.

Finally, you can place your substrate in the GreenBox and start growing mushrooms again. Spray the substrate as in the first growth cycle. This time, give the GreenBox a little more time (up to 2 weeks) until the new mushroom babies appear.

A good supply of oxygen is important for the successful cultivation of mushrooms. It should therefore be in a place that is well ventilated.

In addition, normal room temperatures (18 to 30 degrees Celsius for the Golden Oyster Mushroom and the Pink Oyster Mushroom, 12 to 21 degrees Celsius for the Pearl Oyster Mushroom - and 15 to 25 degrees Celsius for the Italian oyster mushroom) are important for a successful harvest!

The use of the GreenBox tent is recommended until the first small mushrooms start to grow. The mushrooms need high humidity in order to form their first fruiting bodies. This is easier to achieve with the tent.

When the first small mushrooms appear, it is advisable to at least open the tent or, even better, to remove it completely! Also during the rest of the growth cycle.

This is important to ensure a good supply of oxygen and thus good growth.

Use the GreenBox mushroom mode (via the GreenBox app), maintain normal room temperatures (18 to 30 degrees Celsius for the Golden Oyster Mushroom and the Pink Oyster Mushroom, 12 to 21 degrees Celsius for the Pearl Oyster Mushroom - and 15 to 25 degrees Celsius for the Italian oyster mushroom) and spray them regularly with fine water. A small, clean spray bottle is recommended if you don't have one, you can buy one here.

It is advisable to use the GreenBox tent cover to maintain a higher humidity, which the mushrooms like. Leave the tent open occasionally to allow air to circulate around them. The room in which you place your GreenBox should be well ventilated.

Our mushroom substrate is manufactured in such a way that there should be a small gap between the foil and the substrate after insertion into the GreenBox. If for some reason the film sticks to the substrate and there is no gap, you can fold the film slightly. This will allow the young mushrooms to grow better.

In most cases, the mushrooms are ready to harvest about 4-5 days after the small mushrooms appear. Harvest your mushrooms preferably when the edge of the cap starts to flatten. When you see a white 'dust' around your mushrooms, it is high time to harvest. When oyster mushrooms have reached a certain level of maturity, they will drop their spores, which is completely normal. We recommend harvesting just before the spores drop, but you can still eat the mushrooms afterwards. It is not necessary to wash the mushrooms before eating them.

The substrate contains a sterilized mixture of sawdust, wheat bran and water. The packs are inoculated with a mycelium of the selected mushroom variety to transform the barren land into a future mushroom jungle. All organic, free from harmful chemicals, GMOs & co.

As soon as it is time for the next mushroom pack, you can dispose of the substrate in the organic waste without hesitation. We strongly recommend that you recycle it as a plant substrate or turn it into compost.

No, that is a good sign. This is the so-called mycelium. This is how the actual mushroom develops and we harvest its fruiting bodies later.

No, just let these mushroom babies die again. The fungus will then be able to recycle the nutrients used there and use them to grow fruiting bodies on the X-cut.

Don't worry, these are just the spores of your mushrooms. In the wild, these are part of the generative reproduction of mushrooms. This also means that it is high time to harvest your mushrooms, which are of course still suitable for consumption at this stage!

Naturally! They are meant to be eaten! We recommend cooking the raw, freshly harvested oyster mushrooms to get the best flavor and aroma out of them.

Mushrooms are a super healthy food that is not only suitable for vegans. They are characterized by a very low fat profile and a high protein content. They also contain many useful minerals and microelements.


Please ask your doctor if this type of mushroom is suitable for you if you have ever suffered from allergies or digestive problems after eating mushrooms.

In most cases, these are
minor details. The three most important factors need to be checked.

- Humidity:

The most common reason for a lack of growth is a lack of moisture. The substrate should always be kept moist. This is ensured by regular spraying.

If no fruiting bodies are growing after 3 weeks, it can help to soak the substrate in water for 20 minutes. Simply place it in the water with the X-shaped incision facing downwards. This will allow it to soak up enough water. It should then drain for at least 10 minutes so that the substrate is moist but not dripping wet.
Then spray again regularly.

- Temperature:

The temperature should be permanently within the following range. This helps to optimize growth.

Pearl Oyster Mushroom: 12 - 21°C

Pink Oyster Mushroom: 18 - 30°C

Italian Oyster Mushroom: 15 - 25°C

- Light:

We have introduced the so-called mushroom mode in the app specifically for this purpose. This mode ensures optimum lighting, even when using the GreenBox tent.

We would also like to point out that the location of the Greenbox can have an influence on all three factors. The location should ensure the best possible ventilation, a constant temperature and protection from direct sunlight.

In winter, for example, the windowsill is a rather poor
location, as it can be subject to high temperature fluctuations.
Being too close to the heating can also cause the substrate to dry out more quickly.

Microgreens

For the successful growth of your nutrient-rich Microgreens you need a Microgreens tray for the GreenBox - available separately.

In our app and on the packaging you will find detailed instructions for planting, watering and harvesting your microgreens.

We focus on supplying only the best and purest products to our green family. The seeds in the microgreens sets are certified organic and GMO-free.

Please check your microgreens every 1-2 days and keep them moist. You can start harvesting after just 5-8 days. Make sure to distribute the water evenly over all parts of the microgreens pad to ensure even growth.

Rest assured - it's not that - everything is fine! What you are describing are simply small root hairs, which are an indicator of healthy plant growth.

Yes, my green padawan! You can easily combine both Microgreens and PlantPlugs thanks to the GreenBox's modular design. With the Microgreens tray on one side, the other half of your Smart Garden can still hold four PlantPlugs of your choice.

Each plant has slightly different germination and growth phases, which can lead to uneven plant height. However, there is nothing to worry about - these microgreens are so small that the taller and faster ones can have no effect on slightly slower ones. 

Just make sure that you water the pads from above the first time so that the seeds are evenly moistened and can germinate well.

Once your green babies are ready (after about 5-8 days), simply take one of the squares from the microgreens tray and cut it off at the very bottom with sharp scissors or a small kitchen knife. 

We recommend doing this just before using it in your next meal to ensure the highest content of valuable vitamins and minerals.

We recommend disposing of used microgreens pads either in an organic waste container or a composter.

This allows you to return the microgreens pads to the nutrient cycle.

GreenBox Booster

Our PlantPlugs already contain a basic food mix for most plants. However, there are also plants that need more nutrition (e.g. pak choi). We also recommend the GreenBox Booster if you want fast results. With it, your plants will grow almost twice as fast.

In addition, the plants will have absorbed the nutrients contained in the PlantPlug after approx. 2 months. They can then receive new nutrients by adding the GreenBox Booster to the water. In this way you can extend the life of many plants.

The basis of the GreenBox booster is mineral. This means that it contains the same plant nutrients that occur in nature. At the same time, it is free of pesticides, fungicides, insecticides, genetically modified organisms or otherwise hazardous substances.

Organic-based bio-fertiliser smells very strong and also provides a good habitat not only for plants but also for flies. Therefore, we believe that organic fertiliser is better suited for outdoor use than for indoor use. As the base of the GreenBox Booster is not organgic, it is odourless.

Watering

No. The wooden housing of the GreenBox contains a plastic tank. This in turn accommodates the insert with the 8 sockets for the PlantPlugs. In the middle of this insert there are 2 irrigation holes. The GreenBox can be filled with water using a drinking bottle or a standard indoor watering pot without any water dripping onto the wood.

When you start a new planting, the amount of water in the tank should be 1.5 litres. If the plants have already developed more roots, you can fill the water tank to the maximum - with approx. 2.3 litres of water. In both cases the plants are supplied for an average of 14 days. Please note that the water requirement can of course increase at high temperatures.

You can fill the water tank to the maximum - with approx. 2.3 litres of water. If you have started a new set, the initial water quantity of 1.5 litres is enough, as the sprouts and small plants do not need that much water. In both cases the plants will be supplied for an average of 14 days. At high temperatures, the water requirement can of course increase.

Lighting

12 - 16 hours of grow light per day is the most effective level of lighting for the growth of your plants. When you connect your GreenBox to the app, the light is preset to 12 hours/day.

Of course, you can use the app to determine when the light should switch on and off automatically. The light temperature and intensity can also be flexibly adjusted to your mood via the app. In this way, you can even use the GreenBox as a light alarm clock and/or intelligent daylight lamp.

Turn your indoor garden into a stylish designer lamp with the GreenBox Tent!

GreenBox Plus: With a light output of 12 hours a day (recommended lighting duration for optimum growth results), the average power consumption of the GreenBox Plus is around 9.0 kWh per month, which corresponds to a daily additional charge of around EUR 0.09 (as of December 2023).

The maximum output of the LED lights is 45 watts, which corresponds to approx. 15-20,000 lux.

GreenBox: With a light output of 12 hours a day (recommended lighting duration for optimum growth results), the average electricity consumption is around 5.4 kWh per month, which corresponds to a daily additional charge of around EUR 0.05 (as of December 2023).

The maximum output power of the LED lights is 25 watts, which corresponds to approx. 15-20,000 lux.

Shall we give you an insider tip? Use our GreenBox Tent to transform your indoor garden into a stylish lamp in the evening and reduce your ecological and financial footprint.

Please try switching the GreenBox on and off again and restarting the app. Then please test the connection with the app (on/off) and set the times again.

The "Growth" lighting program illuminates your plants with the optimal light intensity for the best possible growth (with 100% light output). The other settings are intended for human lighting needs such as B. "Ambient" as a warm light source for the evening.

If the light of the "Growth" program is too bright for you - with initially no plants or only very small ones - you can reduce the brightness with the slider. However, we recommend 100% light output for perfect conditions. We have developed the GreenBox Tent for the optimal intensity of the plant light and at the same time a pleasant room atmosphere.

An intelligent light function that automatically reacts to the lighting conditions in the GreenBox stand area is being planned. This will then be usable for all GreenBoxes via an update of the GreenBox App. (This applies to both newer and older GreenBox series.)

First check whether you can switch on the light of your GreenBox manually. To do this, press the light sensor on the side of the lighting strip. If the light cannot be switched on there either, try whether it works on another socket. If the GreenBox lighting still does not come on, send us a message to [email protected] and we will send you a new power supply unit.

GreenBox Tent

We recommend using the GreenBox Tent for the first few weeks of the growth phase of your plants. In this phase, the LEDs are perceived as too bright by some indoor gardeners at full light output. As a lampshade, the tent then diffuses the light so that it is perceived as pleasant again.

Once the plants are big enough to touch the tent, it can be removed for the remainder of the grow cycle. The plants now scatter the light from the LEDs.

The GreenBox Tent only obstructs the plants when they have grown so large that they noticeably touch the tent wall. Once the plants have reached this size, they cover the LEDs and diffuse their light. The tent can be removed for the remainder of this growth cycle.

GreenBox App

You can find the GreenBox app on Google Play and in the Apple App Store. Please search for "GreenBoxApp" there or use one of the following links:
GreenBoxApp in the Google Play Store, GreenBoxApp in the Apple App Store.

You can also use the GreenBox without the app, but we recommend using the app for the initial setup of the GreenBox (e.g. to set the on/off times).

You can also switch the light on and off manually using the touch sensor on the right-hand side of the GreenBox.

Yes, you can manage multiple GreenBoxes via the app.

The connection between the app and GreenBox is only possible if you have granted the app access to your location and Bluetooth is activated. If these settings are already active, briefly check whether the GreenBox light can be switched on manually. To do this, press the light sensor on the side of the lighting strip. Does the light not work either? Then the power supply unit is probably defective and your GreenBox is not being supplied with power. Contact us at [email protected] and we will send you a new one.

Please contact us at [email protected]. We will check the verification email and send it out again manually if necessary.

Miscellaneous

Orders leave our warehouse within 1-3 working days. Normally we ship on Tuesdays and Fridays. (If these days are public holidays in Berlin, correspondingly later.) Orders received by then then go on their journey, which takes about 1-4 working days within Germany.

That's fine. Simply order your GreenBox or the GreenBox Bundle of your choice here on our website. To arrange a pick-up time, simply give us a call or send us an email (stating your order number). You can find our contact details here.

You can also see and buy the GreenBox live here!

You can find spare parts in the accessories section.

Naturally! LEDs have a long service life. (The ones from our prototype still light up!) However, if something should happen contrary to expectations, repairs can be carried out quickly and easily in our Berlin workshop at standard repair and shipping costs. If necessary, please send us a message. You can find our contact details here.