From One Plant to a Blooming Oasis: What Spring Should Look Like
Imagine a garden with a colorful variety of flowers and buzzing bees flying from blossom to blossom. The air is filled with the sweet scent of lavender mingling with the earthy aroma of damp soil. The sound of birdsong and rustling leaves fills your ears. This is what spring could look like after a seemingly endless winter... Luckily, you can create your own "mini spring" at home with your plants and flowers.
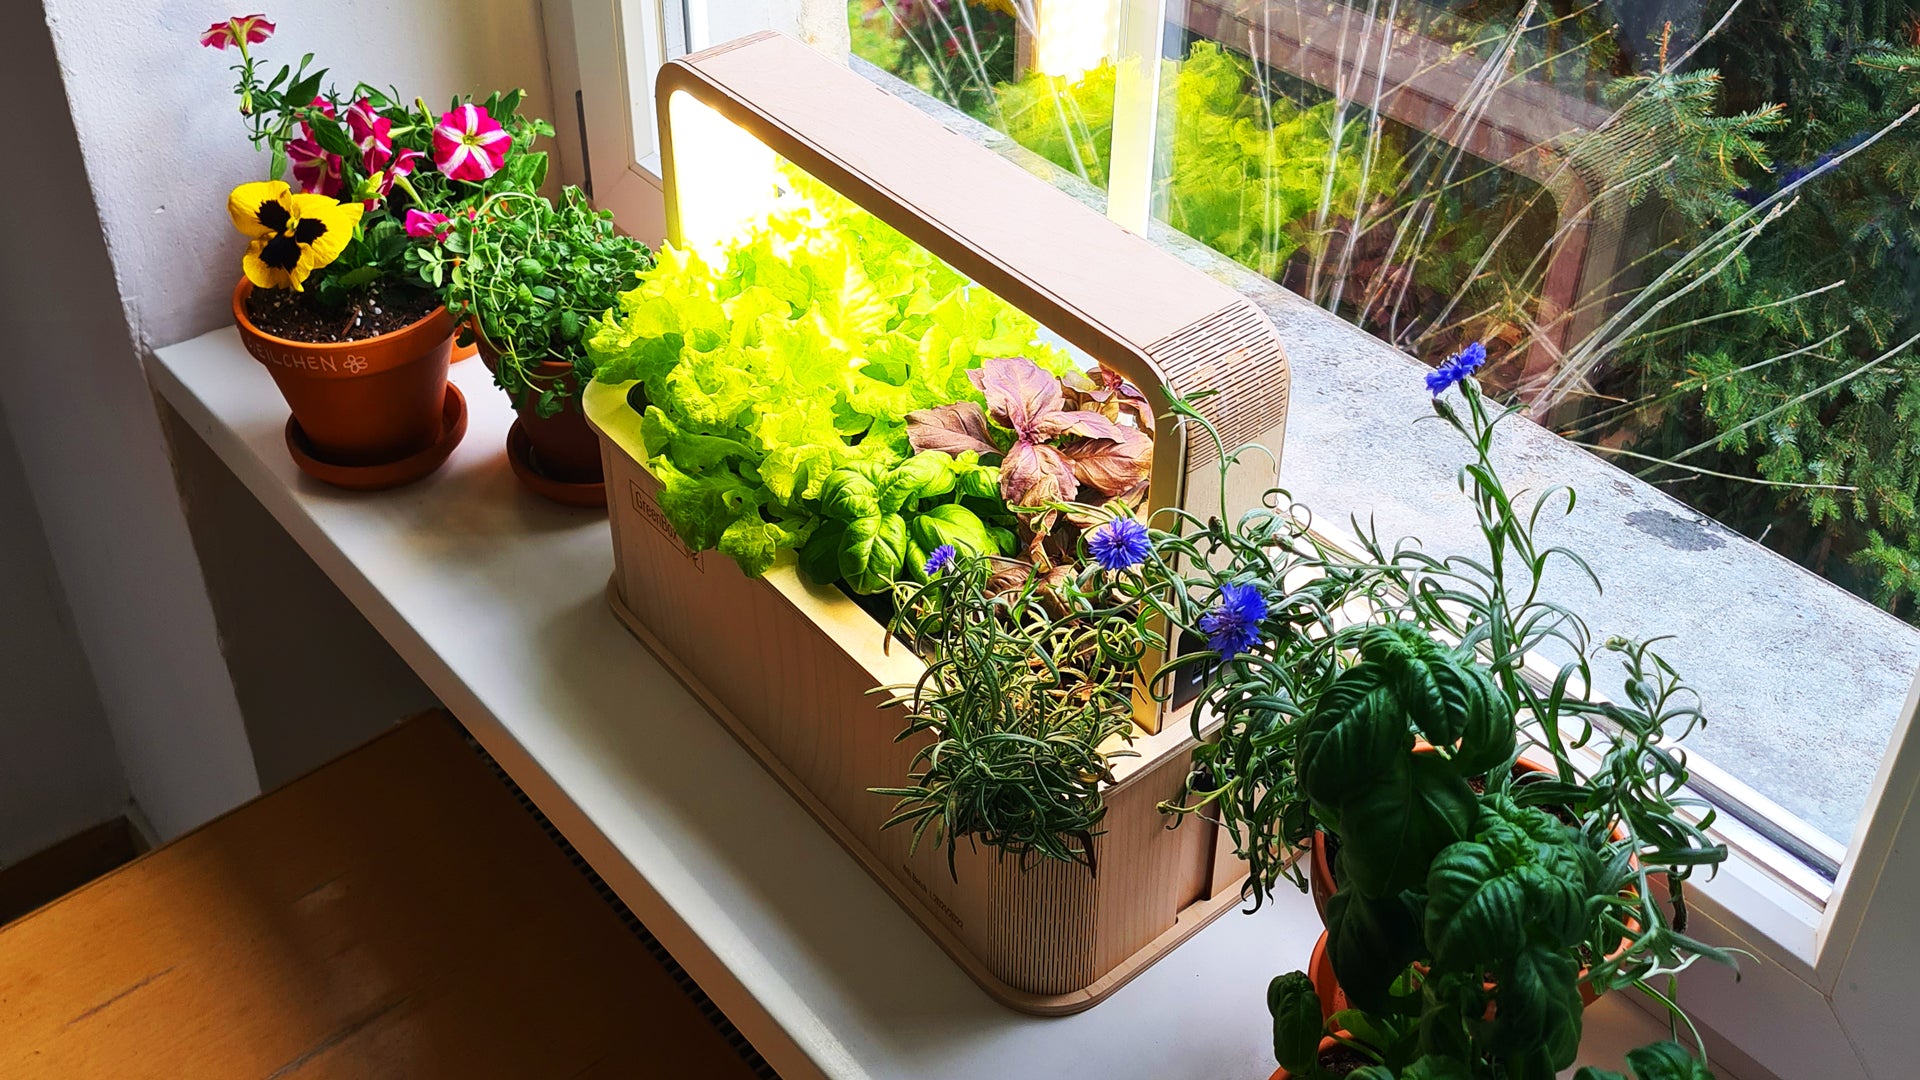
The best growing station for all your planting needs
But bringing spring to your balcony and windowsill isn't always so easy, as many things can go wrong, such as not enough sunlight at home or not enough space to grow seedlings. Watering can also be tricky - especially during seasonal changes - or when you want to give your green companions the right amount of water. And how can you make sure that the newborn green babies get the nutrients they really need? If only you had a reliable growing station to make everything easier for you...
You actually have one! The GreenBox mimics the natural sunlight your plants need, uses a special substrate mix (more on that later), and best of all? You only need to water it once every 2-3 weeks and that's it. Yes, really.

How to turn your seed into a plant: a step-by-step guide
But how do you actually grow plants in the GreenBox? BERLIN GREEN has a step-by-step guide for you:
1. get the pre-cleaned GreenBox ready and connect it to the power supply.
2. Choose your seeds, e.g. mini cucumbers.
3. use our PlantPlugs.
4. Place the seeds in the perforations provided in the PlantPlugs.
5. Fill up the water reservoir and add a cap of our liquid fertilizer (optional, for the extra boost).
6. Then you can add the U-plates (prevents algae growth) and germination caps (maintains the humidity).
7. After 2 - 3 weeks, the plants will have reached a suitable size for repotting.
And by the way: If you are unsure which seeds to start with, our Shop offers over 40 different seeds, all of which are guaranteed to grow. And yes, we'll make it easy for you :)
"They grow so fast..." What to do when your favorites are ready for transplanting
After 2-4 weeks, your green darlings are ready to be repotted and moved to a new home. And we already have a great destination in mind. Clay PlantPots are an excellent choice for plant owners. They are porous, which allows air and moisture to reach the roots and maintain a healthy root system. The PlantPots are also heavy and stable, which prevents tipping, mess and damage to your plants. They come in different shapes and sizes to suit different plants and decorating styles, are environmentally friendly and durable.
The PlantPots come with a lightweight, peat-free and contaminant-free soil mix that is ideal for retaining and gradually releasing water and nutrients. The addition of coconut fiber increases air permeability, which roots love. The soil is also enriched with minerals to nourish your plants for the first six weeks. After that, fertilization is recommended for an extra boost. The PlantPots and their accompanying soil mix make it easy for plant owners to create a healthy and thriving environment for their plants without having to worry about which soil mix is right or lugging heavy bags of soil.
From the green box to the pot: a guide
Moving can be difficult, right? Not if BERLIN GREEN supports you. The PlantPlugs we use retain their shape even after weeks of use, so think of it as a simple (new) insert-and-release endeavor. Here's what you need to know as our green apprentice: your PlantPots and labeled with the Magic Pen (optional)
- Place the enclosed filter paper at the bottom of the pot (keeps the soil in the pot and still allows drainage).
- Fill the pot with soil (approx. 5 cm high).
- Remove the U-plates from the seedlings in the green box.
- Carefully pull the seedling out of the PlantPlug insert and place it in the prepared pot.
- Fill the soil to the side, just above the edge of the PlantPlug.
- Press down the soil and top up if necessary.
- Finally, you can water it carefully until the water in the saucer runs out
- The nutrients in our peat-free soil are actually sufficient for the first 6 weeks, but for an extra boost you can add 1 capful of our liquid fertilizer to the water
- Place the pot in a bright place and water it regularly.
Too simple to be true
But can it really be that simple? Absolutely it can! Here are some success stories of home-grown, thriving mini-forests from our customers. 


Welcome to the jungle...
Special offer*: If you buy a GreenBox Urban Jungle Bundle, you will automatically receive 1 additional PlantPots set for free - without any codes during the promotional period.

👉 https://berlingreen.com/products/greenbox-urban-jungle-bundle
Would you like more? When you buy PlantPots sets, you can buy 2 and get 1 for free. In this case, remember to add 3 PlantPots sets to your cart and apply the promo code HELLOSPRING before purchasing :) *This promotion is valid until the end of March.